A guide to starting your day on the right foot.
Brides, let’s talk about the first few hours of your wedding day. Eager, nervous, whatever you may be feeling, you’ve probably forgotten about this portion of the day. I totally get it! You’re focusing on bridal portraits, walking down that aisle, dancing the night away… and “getting ready” can be easy to overlook. But as a wedding photographer, this is where my job begins. Here is my four-step guide to creating beautiful getting ready images from the get-go.
Designate a spacious room with lots of bright, natural light.
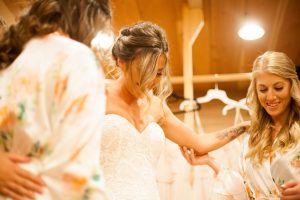
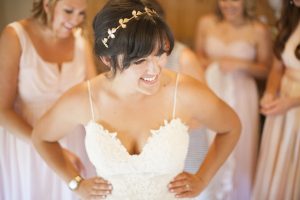
This is thee biggest factor in determining the overall look of your getting ready images. As a PNW wedding photographer, I’ve walked into plenty hotel rooms that are not meant for weddings. Dark and out of date, they don’t necessarily do the trick for bright, crisp images. I suggest touring your venues first, or choosing a home that has at least one room with a large window. The natural light creates a clean feel all on its own, especially when you compare it to images taken in fluorescent light. And bonus: your MUA loves it too because it better allows them to match skin tones.
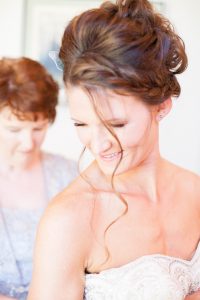
Analysis: take a look at the two images above. I purposefully chose two images that are very similar in composition. As you can see, the image on the left is darker and the skin tones are not quite as accurate at the image on the right. That’s because the image on the left is taken in a room with fluorescent lighting, whereas the one on the right is taken in front of a large window.
Keep it tidy and free of clutter.
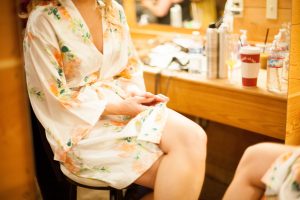
The last thing you want is to look back at your getting ready pictures and notice a trash can in the background. This happens often with designated bridesmaid or bridal suites. We get very unintentional with the location we place items such as snack trays, drink carriers, etc (all very necessary items, but not the most flattering details). A good idea would be to designate a few bridesmaids to keep an eye on this, picking up garbage throughout the morning and keeping the room tidy and organized. This also spares your photographer from spending their treasured time cleaning when they could be snapping more images.
Analysis: not only are the two images above also a great example of fluorescent and natural light, take a look at the room. One is littered with to-go cups, water bottles, etc, while the other has a clutter-free workspace. The distraction is literally non-existent in the second image, and your eye is drawn exactly where it should– the bride.

Choose your company wisely.
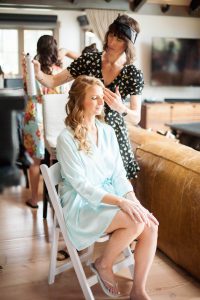
This is huge. When you have people coming in and out of the room, it can create a busyness that leads to stress. And that is the last thing you need on a day that should be blissful– too many hands in the pot. So keep your group small and fill your room with people that will keep you calm and collected. The most important people are usually bridesmaids and your mother. Politely tell other family that instead of coming in to see you before you’re ready, that they may see you coming down the aisle and shower you in hugs during the reception.
Analysis: honestly, I didn’t have many examples of too many people in the room, thank goodness. But as you can see from the images above, having less people in the room also creates less chance for untimely photo-bombing.

Coordinate well and have your details ready.
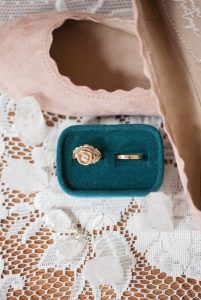
This probably goes somewhat hand in hand with keeping your bridal suite tidy, but it is super helpful to set aside all your special details beforehand. This is usually rings, invitations, garter, shoes, dress, jewelry, cuff links, and any other custom details that are special to you. Taking a moment to do this allows your photographer to get right to work while you’re in the beginning stages of hair and makeup, utilizing time in the most efficient way possible. Matching simple robes or kimonos (socks for the dudes), can also make for very cohesive and beautiful getting ready images.
Analysis: notice that even though the above images are two completely different moments, they still coordinate. Attention to colors and textures can create a beautiful cohesiveness throughout the final gallery.
One last tip: try not to overthink it. Have fun and avoid getting overwhelmed. This four-step guide to creating beautiful getting ready images really is simple and doable.
Xoxo, Char


comments +